A lift that ignores a landing call can create more than inconvenience. It may indicate a power issue, a failed input, a communication fault, or an unsafe door circuit. The right response begins with evidence, not guesswork. Before asking, “How to troubleshoot a lift controller that isn't responding?”, confirm the lift is safely removed from service and inspected by a qualified technician.
Industry reports show why disciplined maintenance matters. The International Energy Agency’s Buildings report states that buildings consume about 30% of global final energy. Lift systems contribute through motors, lighting, standby controls, and repeated operation. A controller fault can therefore affect safety, availability, and energy performance. The European Lift Association also emphasizes inspection, modernization, and competent maintenance across the lift lifecycle. These findings support a practical approach: check the simplest causes first, then examine controller signals and fault history.
A dark display may point to a supply problem. A lit display with no movement suggests a different path. Look closely. Is the emergency stop engaged? Are the doors fully closed? Is a fault code flashing beside the drive? Small details often reveal the failure’s pattern. However, a reset is not always a repair. Repeated resets can hide a deteriorating relay, encoder, brake, or safety chain. This guide presents seven careful checks, informed by manufacturer procedures and recognized lift safety principles. It also acknowledges an uncomfortable truth: remote troubleshooting has limits. If symptoms remain unclear, stop testing and arrange a documented professional inspection.
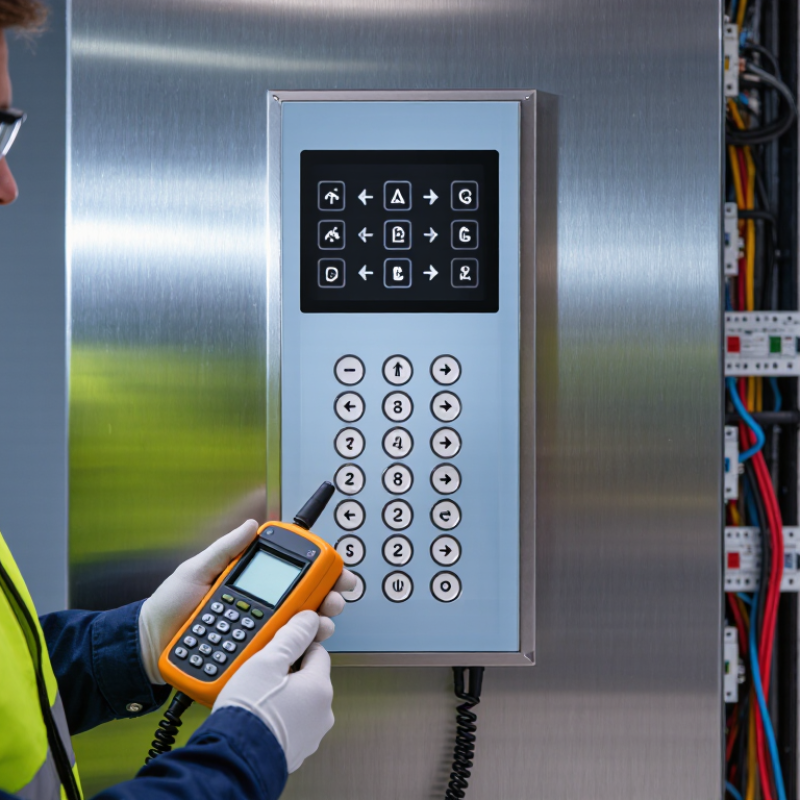
A non-responsive lift controller often gives small warnings before a complete failure. The lift may ignore floor commands, stop between levels, or show no display. Doors can remain open, close slowly, or reopen without a clear obstruction. Listen for silent relays, repeated clicking, or an unusual lack of motor sound. These signs matter.
Tip 1: Record the exact symptom and affected floor.
Tip 2: Check whether the controller has power and visible status lights.
Tip 3: Read displayed fault codes before resetting anything.
Tip 4: Inspect the emergency stop and door interlock indicators.
Do not bypass safety circuits. A temporary movement is not a repair.
A qualified technician should inspect wiring, fuses, communication signals, and stored fault history. Tip 5: Compare the controller response with the maintenance record. A recent voltage event may explain sudden behavior. Tip 6: Reset the system only through approved procedures. Repeated resets can hide a developing fault. Tip 7: Stop operation when the lift behaves unpredictably, then arrange a professional inspection. One detail is easy to miss: a dark display may indicate a failed screen, not a dead controller. I have learned that assumptions waste time. Measure carefully, document clearly, and question the first diagnosis.
| Tip | Common Sign | Likely Area to Check | Recommended Check or Action | Expected Result |
|---|---|---|---|---|
| 1. Verify the power supply | The controller display is blank, status lamps are off, or the lift does not react to any call. | Main isolator, control-circuit supply, fuses, circuit breakers, and incoming voltage. | Check for a tripped protective device and confirm that the controller receives the voltage specified on its electrical drawings. Do not bypass fuses or protective devices. | The controller powers up and its normal status indicators become visible. |
| 2. Inspect the emergency-stop circuit | The lift remains unavailable after a stop command, or a safety-chain fault is shown. | Emergency-stop buttons, stop switches, safety relays, and the series safety circuit. | Confirm that all emergency-stop devices are released and inspect the controller’s safety-chain indication. Reset only after the cause of the stop has been addressed. | The safety circuit is closed and the controller permits normal operation. |
| 3. Check door interlocks | The lift is at a landing but will not move, or the doors repeatedly reopen. | Landing-door locks, car-door contacts, door-zone sensors, and obstruction detection. | Make sure doors close fully and remove visible obstructions. A qualified technician should test interlock continuity and alignment; never short or defeat a door interlock. | The controller recognizes all doors as safely closed and locked. |
| 4. Review displayed fault codes | The display shows an alarm, error code, flashing status light, or repeated reset condition. | Controller diagnostics, event history, motion faults, and safety inputs. | Record the exact code and operating conditions before resetting. Use the lift’s service documentation to identify the fault instead of repeatedly cycling power. | The fault is identified and the controller remains operational after a safe, documented reset. |
| 5. Examine communication and call inputs | Call buttons illuminate but the controller does not register a request, or only some landings respond. | Car operating panel, landing call stations, input terminals, network connections, and loose wiring. | Compare the controller’s input status with the pressed call button. Inspect connectors and wiring for looseness, corrosion, or damage while power is isolated as required. | The selected call appears correctly at the controller and a valid service request is generated. |
| 6. Check position and limit signals | The lift stops unexpectedly, fails to level, or the controller reports an invalid position. | Position sensors, leveling devices, encoder connections, and terminal-limit switches. | Inspect sensor mounting, connectors, and visible damage. Testing and adjustment of travel limits or encoder feedback must be performed by a qualified lift technician. | The controller receives stable position feedback and the lift reports the correct floor. |
| 7. Reset only after the cause is known | A temporary reset restores operation, but the same non-responsive condition returns. | Intermittent wiring, overheating, recurring safety faults, drive faults, or failing control components. | Record the time, fault code, temperature, load, and recent maintenance history. Remove the lift from service if the fault repeats or safe operation cannot be confirmed. | The root cause is repaired and the lift passes the required safety and operational tests before returning to service. |
Safety note: Lift controllers, safety circuits, door interlocks, and motion equipment should be inspected or repaired only by qualified personnel following applicable local regulations and the equipment’s service documentation. Keep the lift out of service whenever safe operation cannot be verified.
The lift may ignore floor commands or stop between levels. The display may remain dark. Doors might stay open, close slowly, or reopen unexpectedly. Repeated clicking and missing motor sounds are also warning signs.
Record the exact symptom, affected floor, time, and door behavior. Note every flashing light, alarm sound, and displayed fault code. A short video may help, if taken safely from outside the lift. Details matter.
No. A dark screen may indicate lost power, a loose supply wire, or a failed fuse. It could also be a failed display. Measure the incoming and control voltage with suitable equipment.
A qualified technician should inspect terminal screws, connectors, ribbon cables, and visible fuses. Look for looseness, corrosion, heat marks, or moisture. Small droplets can cause confusing faults. Do not force or pull cables.
Reset only through the approved procedure in the operating manual or site instructions. Record fault codes before resetting. A reset may clear a temporary communication issue, but it cannot repair damaged wiring or failed sensors.
Repeated resets can hide a developing failure. The lift may work briefly, then stop again. I once treated an intermittent fault as harmless. That assumption was wrong.
No. Never bypass door interlocks, emergency-stop circuits, or other safety devices. Temporary movement is not a repair. A bypass can expose passengers to serious danger and conceal the real fault.
Stop operation when the lift behaves unpredictably, stops between levels, or repeatedly fails after resetting. Keep passengers away from it. Arrange professional inspection without delay. Waiting can turn a small fault into a longer shutdown.
The technician can test voltage, fuses, relays, wiring, input signals, circuit boards, communication paths, and safety circuits. They should review stored fault history and maintenance records. Ask for a written report. It should list the fault and replaced parts.
When a lift controller stops responding, begin by identifying common signs such as unresponsive buttons, stalled movement, missing display messages, unusual sounds, or repeated fault indications. How to troubleshoot a lift controller that isn't responding? Start by checking the main power supply, circuit breakers, emergency stop devices, and safety circuits, while avoiding any exposed electrical components. Next, inspect control panel connections for loose wiring, damaged terminals, or visible error indicators. Sensors, call buttons, door-position devices, and communication components should also be checked for obstruction, damage, or signal loss.
If conditions are safe, follow the equipment’s approved procedure to reset the controller and observe whether the fault returns. Record any error codes and note when the issue occurs, as this information can help with diagnosis. If the controller remains inactive, the problem involves safety circuits, or inspection requires access to electrical or moving parts, stop troubleshooting and arrange service from a qualified lift technician. Safety systems should never be bypassed, and the lift should remain out of operation until it has been professionally assessed.

 Kathy lift